This page may contain affiliate links.
Read our disclosure and privacy policy here.
Creating a habitat for isopodsAn isopod is a type of small creature that belongs to the crustacean family, just like crabs and lobsters. They have a special body shape with a hard outer shell, which protects their soft insides. Learn More is an easy and fun project to do. Isopods are easy to find, and you probably have all the materials you need already at home. You will need to go out and collect a few things from the back yard. Just make sure that all the natural things you collect are not from a park or other urban area where pesticides may have been sprayed. If you’re going to collect things from nature, a nature trail would be your best bet. Once you’re done creating a habitat for isopods, you’ll be able to spend some time watching their behavior, from their defense mechanisms to their eating and social habits. Let’s get started!
Table of Contents
How To Create A Habitat For Isopods
Useful Lesson Opportunities From This Project
- Science and Nature
- Learning about various kinds of isopods, their food and humidity requirements, their role in the ecosystemAn ecosystem is a community of living organisms, like insects and birds, and non-living components, like water and rocks, that interact with each other in a specific area. Learn More.
- Learning what a detritivoreDetritivores are special animals that eat dead plants and animals. They are like the cleaners of the animal kingdom. Just as you might clean up crumbs or sweep away leaves, detritivores help clean up the environment by eating things that have died. Learn More is, and what they eat.
- Ventilation requirements for bug habitats.
- Paying attention to the unique requirements of bugs when choosing to keep them.
- Outdoor Time
- Going outside to find isopods as well as natural elements for the habitat.
- Learning about how pesticides are used in cities, and where to go to find natural elements without pesticides.
- Getting your fingers in dirt and mud – because that’s always important and worthwhile in itself!
PROJECT PREVIEW
Project Preview
Project Preview
sneak peek
List of Materials & Tools
Materials Required
- Clear plastic container with a lid. A shoe-box size clear plastic container is usually the best for this.
- 1 to 2 cups of worm castings or compost
- 1 to 2 cups of organic garden soil
- Coco coirCoco coir is an essential element of many substrates for animal habitats, as well as to prevent compaction of soil for house plants. Click to view pricing and availability. / cypress mulch / orchid bark / fir bark (any of these is fine)
- Sphagnum moss
- Limestone / egg shells / cuttle bone (any of these is fine)
- Cork bark / dry rotting wood
- Leaf litter collected from an area without pesticides, preferably oak leaves
- distilled water and spray bottleA mister is an essential tool for anyone looking to create critter habitats, or be a plant parent. Click for pricing and availability.
Recommended Tools
- Drill and 1/18″ drill bit, or soldering iron (with adult supervision)
Creating a habitat for isopods
OK We’re all set! There is a lot of room for experimentation and personal choice in this project. The main things that are critical are:
- Have a container with good ventilation (that’s why we suggest a plastic container, so that holes can be easily drilled into them or melted into them with the soldering iron).
- Mare a good substrate that is light and will not compact too tightly.
- Include a good source of calcium (eggshells, limestone, cuttlebone, calcium powder, etc)
- Include food (leaf litter, rotting wood, etc. Some species of isopod need protein as well, so some dead insects might also be beneficial once in a while).
- Don’t let the habitat dry out (crucial).
- Include some hides (places for the isopods to hide away and feel safe, like rotting wood, bark, leaf litter).
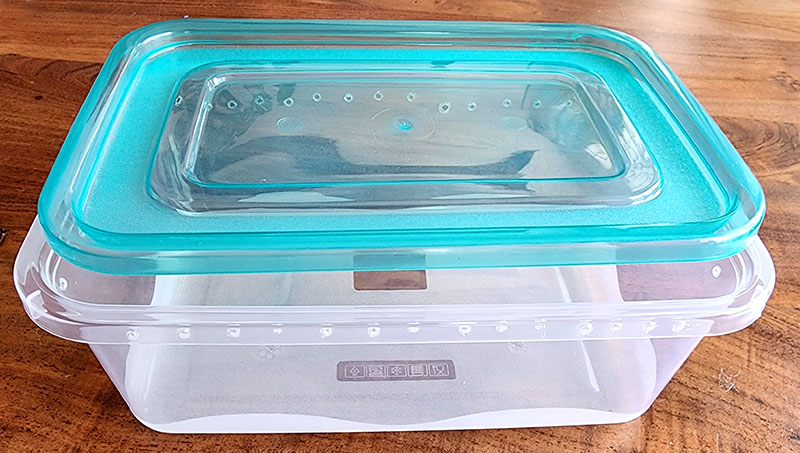
A perfect and inexpensive container to create an isopod habitat. Notice the ventilation holes are on the side, not the top. This makes it easier to stack container if you create more than one. It also allows for more effective cross ventilation in the habitat.
Step 1: Create The Substrate
Substrate is a word you hear often when working with detritivores like isopods. The substrate is the dirt mix – the garden soil, leaves, moss, rotting wood, and all other ingredients you will mix together to create an ideal living environment for the isopods to match what they would have in nature.
In nature, the substrate that isopods live in serves two purposes. It gives them a place to burrow into an live, and it gives them food. An ideal substrate mix will provide both of these things. Isopods will burrow into a substrate as they move from place to place looking for the ideal environment. If it gets too dry, they burrow into the substrate towards layers of soil that are more moist. If the moisture is too high, they will burrow or migrateMigration is the regular movement of animals from one place to another, often to find food or better weather. It’s a seasonal trip that many animals take for survival. Learn More to areas in the substrate that are drier. It’s difficult to create a substrate that will be perfect at all times, so another important element in create the ideal habitat for isopods is called the moisture gradient. We’ll get into that a little further down.
Ideal Isopod Substrate Recipe
There are so many factors that affect the exact properties of the ingredients I’m going to suggest here, so what’s ideal for me might not be ideal for you. The main goal is to create a light weight mix that is able to hold moisture and has enough organic matter in it to provide food. Here’s my recipe that’s worked for most of my isopods. You can mix all these ingredients in a separate container to get it ready to add to the habitat.
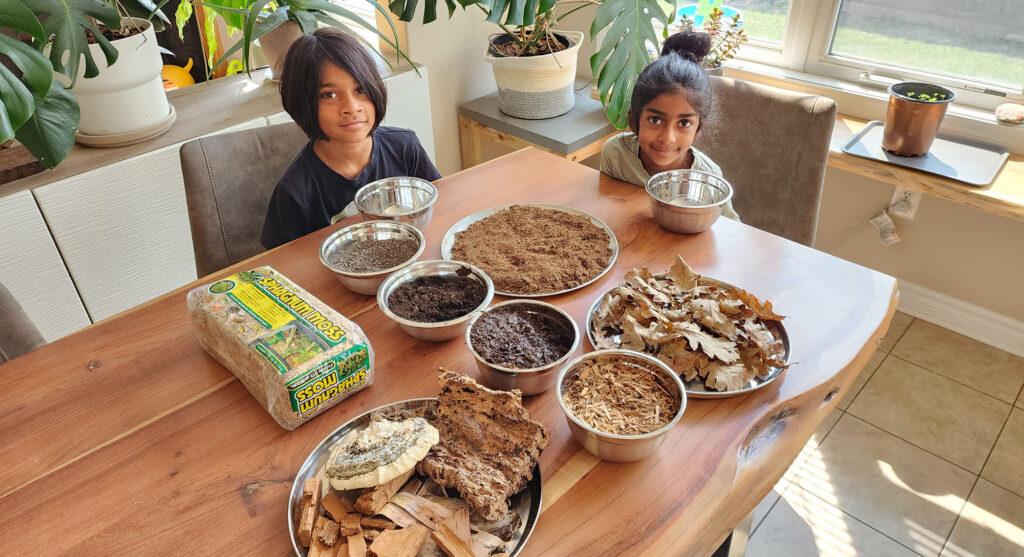
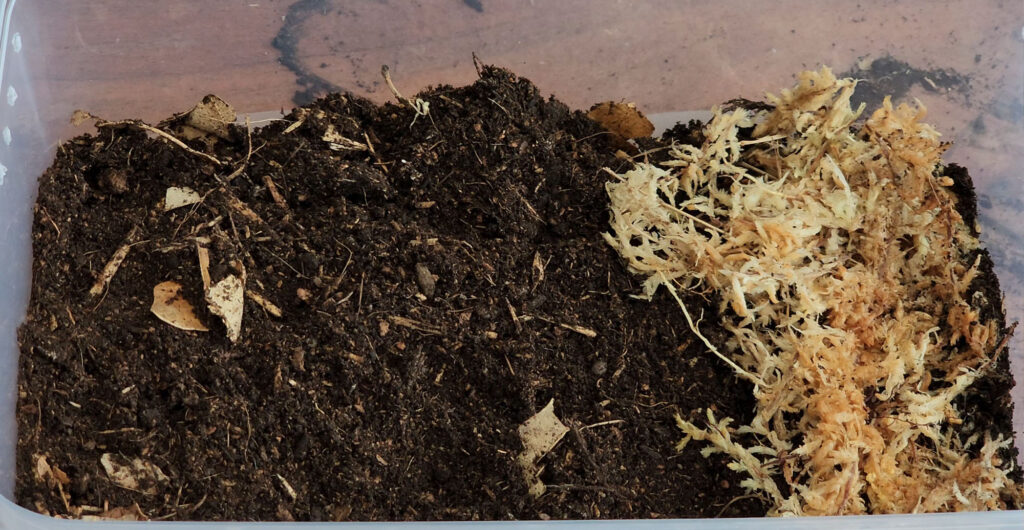
We’ve got all our ingredients ready to create our isopod habitat: organic soil with worm castings, coco coir, cypress mulch, limestone screenings, leaf litter, rotting wood, bark, and sphagnum moss.
- 1 part organic garden soil (no additives)
- 1 part coco coir ( you can also use peat moss, but since it usually comes from a non-renewable source I prefer not to use it. If you already happen to have some around, go for it.)
- 1 part worm castings / compost (for food)
- 1 part cypress mulch (food, and to make the mix lighter and hold more moisture)
- 1/2 part shredded oak leaves (you can just tear these so that they mix well into the substrate
- 1/2 part shredded sphagnum moss ( strands can be torn into smaller bits. Soak the moss, and then squeeze out the water before adding it to the mix.)
- Optional: 1/4 part granulated limestone / egg shell (for calcium, but you can also use egg shells laid out on the surface or a limestone rock or even a piece of cuttlebone on the surface)
I’m going to add here that it does not need to be overly complex. While I’ve listed the ingredients I like to use, isopod substrate can be as simple as garden soil mixed with enough leaf litter to make the mix airy and prevent it from compacting too much. Adding leaf litter on top with some egg shells and some dry rotting wood will provide all the food they need. My recipe above is one I use when I’m keeping isopods. In the end, the key will be the moisture gradient.
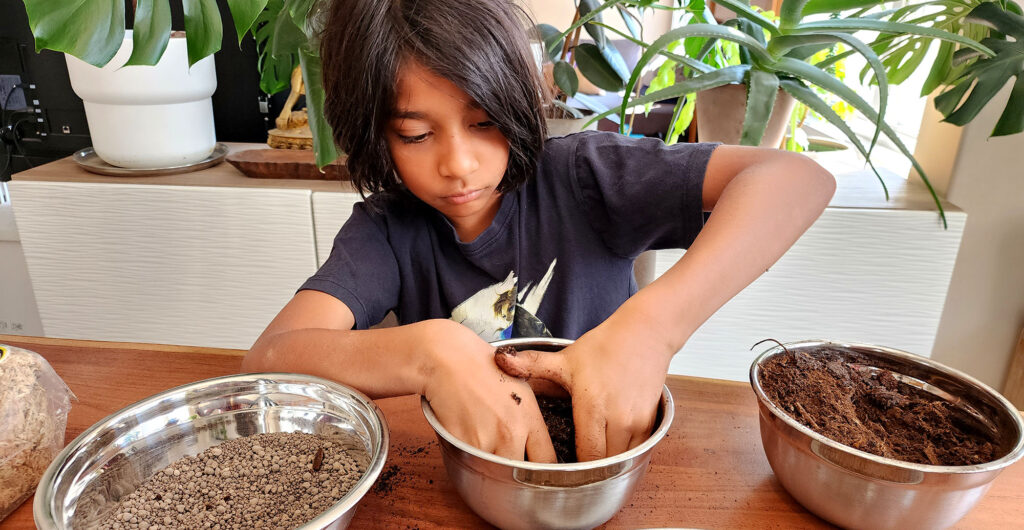
We use a stainless steel bowl for all our mixing projects, because they are easy to clean, and will not break if dropped – which happens a lot!
What's A Moisture Gradient?
In nature, isopods will move around a lot. They are looking for food as well as an environment they like. If the space they are in gets too wet, they move somewhere drier. If it’s too dry, they move towards places that are more wet.
When creating a habitat for isopods, it’s impossible to create a space that is going to have the perfect amount of moisture all the time. This is why having a moisture gradient is essential. A moisture gradient means that one side of your isopod habitat will be moist (not wet!), and the other side will be dry. This will allow the isopods to choose where they want to spend their time. They know best what they need in terms of moisture, so a moisture gradient allows them to choose where they feel most comfortable.
A moisture gradient can be created in an isopod habitat by putting damp sphagnum moss on one side, and only misting that side. As a result, the humidity will be higher on one side of the habitat as opposed to the other side.
Isopods are crustaceans. The ancestors of terrestrial isopods came from the water, and terrestrial isopods still have gills. This means that they need moisture in order to breathe. This does not mean they are aquatic – they will drown if submerged in water. But they still need moisture to breathe. A moisture gradient is the best way to make sure they can self-regulate the moisture they need to survive.
Step 2: Assemble The Isopod Habitat
If you have not yet drilled ventilation holes into your habitat container, now is the time to do that. The two easiest ways are to drill into your container with a drill and a 1/8″ drill bit, or to use a solder iron on LOW heat to simply melt holes into the container. A drill is quick and easy but produces a lot of plastic shavings which can be hard to clean. A soldering iron is not messy, but you need to do this outside with good ventilation (and ideally a mask) as melting plastic can produce toxic fumes. I use the soldering iron method because it’s less messy and I always do it outside, with a mask on.
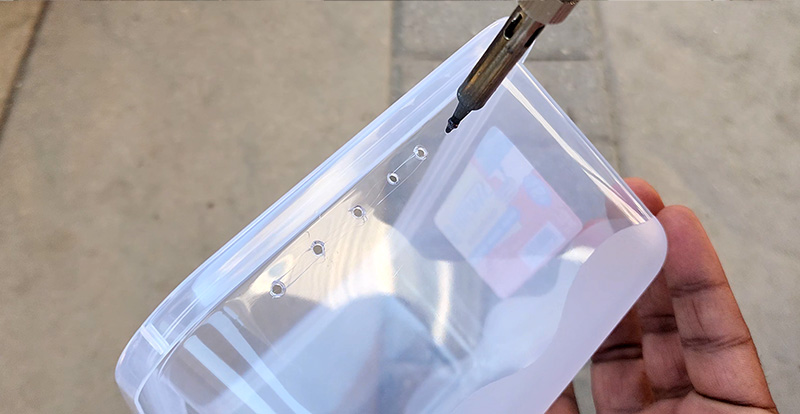
I’m making ventilation holes here with a soldering iron on a low heat setting. Make sure to do this outside where there is plenty of ventilation, and with a mask on to prevent inhaling possibly toxic fumes from the melting plastic. Alternately you can also do this will a drill.
I recommend placing the holes on all sides of the container, as high as you can go. If you’re using a shoebox size container, I recommend at least 10 holes on the short side, and 20 holes on the long side. Too little ventilation can cause mold overgrowth and stagnant air. It’s always better to have more ventilation than less. Some people prefer a little less ventilation in order to conserve humidity, but I prefer to add more ventilation and simply mist the habitat with distilled water more often.
Once the ventilation holes are done, add your substrate mix to the habitat container. Make sure you add enough to get a substrate depth of 2″ to 3″, so that the isopods have room to burrow into it.
Once the substrate is in place, pick one side of the container to be the high humidity / moisture side. On that side, add more sphagnum moss to help maintain a high humidity in the area. If your sphagnum moss is dry or compressed, you need to soak it in distilled water for a little bit and allow it to expand, like a sponge. Then squeeze out most of the water and lay it down over the substrate on humid side of the container. The high humidity side should be about one third of the length of the container. Leave the other side of the container dry, and do not spray that area with water during your maintenance of the habitat.
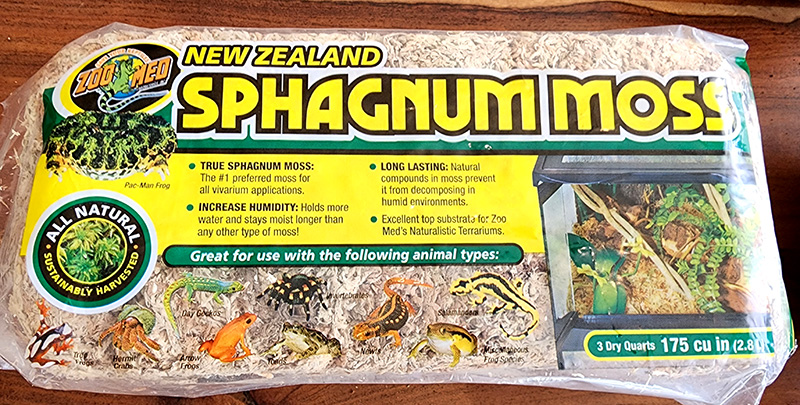
This is our preferred sphagnum moss. It’s a high quality product made for use with pets, and it absorbs water will and maintains humidity for a long time. In your isopod habitat, it will help to prevent your isopods from drying out in case you forget to mist the habitat for a few days.
Next, add some ‘hides’ (places for the isopods to hide and feel safe) like cork bark, tree bark, rotting wood pieces, and calcium sources like limestone, eggshells, or cuttlebone. Finally, spread out some leaf litter around the container. It will create a few additional places for the isopods to hide, as well as serve as food.
Once all this is in place, spray a bit of distilled water onto the sphagnum moss to wet it just a little, and you’re done!

It’s a good idea to have a water mister filled with distilled water on hand at all times. Just fill it and keep it around to help you mis the habitat as needed. Before you mist the habitat, feel the sphagnum moss to make sure it’s not too wet. If it’s still wet from the last misting, don’t mist again. Only mist when it is damp and on its way to drying out, or if you see that the soil is very dry, or the isopods are spending most of their time in the moss. If so, it means that the rest of the overall habitat needs more moisture.
Step 3: Add The Isopods!
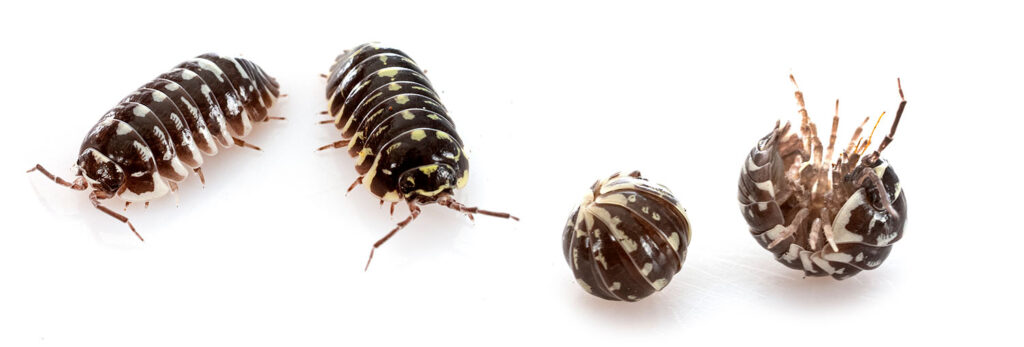
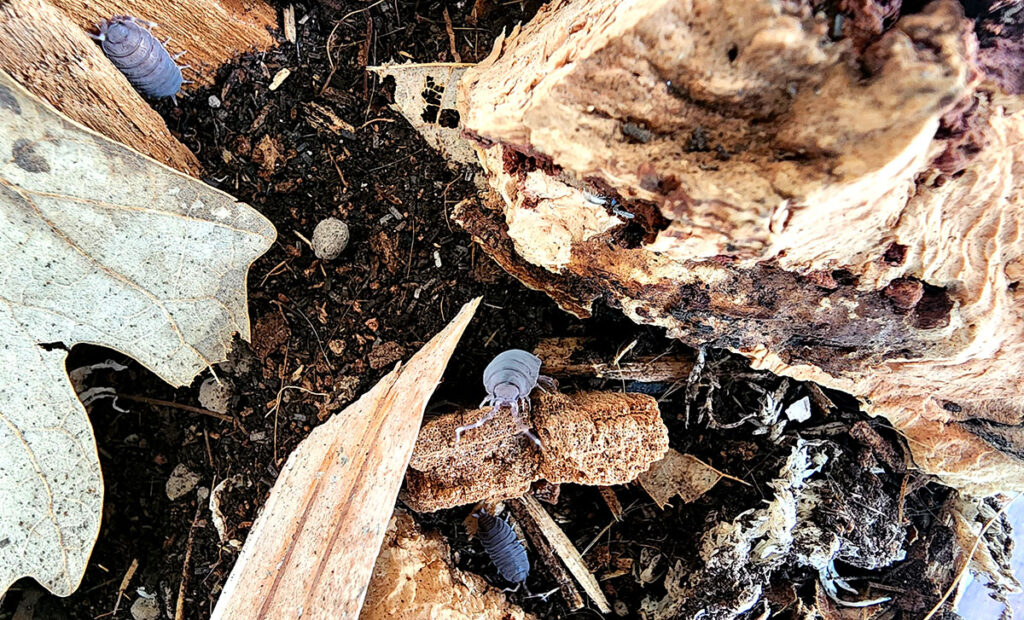
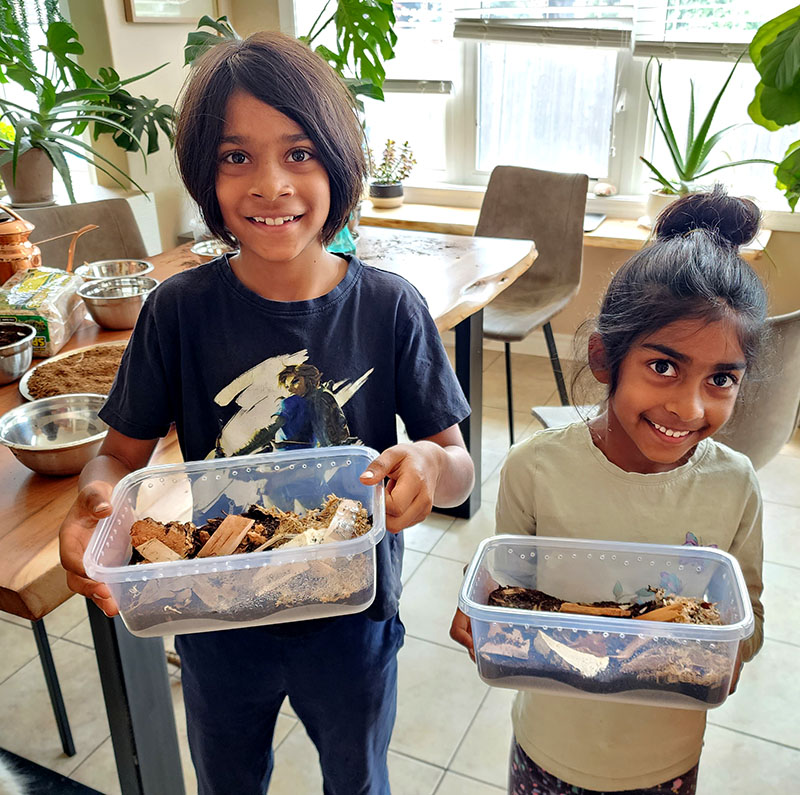
This is of course the most fun part of the project: finding some isopods (if you have not done so already) and adding them to the container! There are a lot of different species of isopods you can find in your garden or on nature trails, so take some time to explore all the cool different species and their interesting color patterns.
I recommend keeping different species in their own containers as some species may be aggressive towards others. It will also allow you to observe how each species behaves in their habitat, and make adjustments to how you care for them based on what you learn from observing them over time.

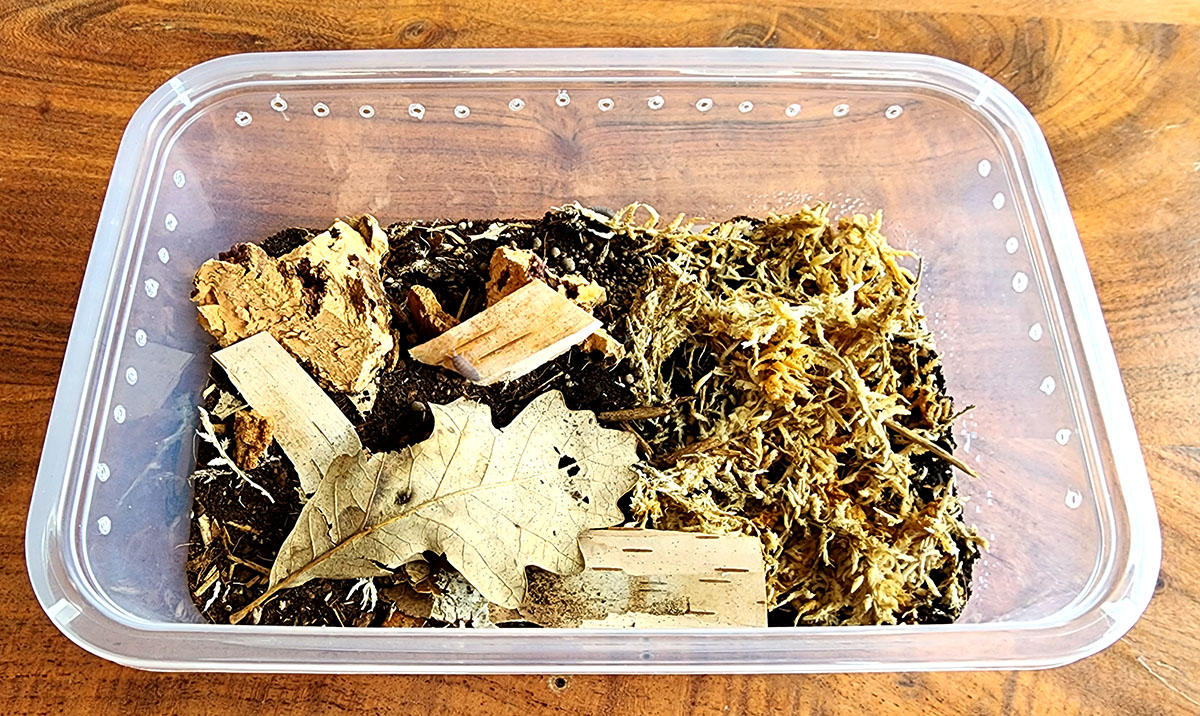
Our compelted isopod habitat!
Feeding And Maintenance Of Your Isopods
Isopods are detritivores. So their diet is pretty flexible! They will survive well by just eating leaf litter and rotting wood in your habitat however it’s best if you provide them some variety. Carrots, cucumber, sweet potato, zuchini – these are all good options. But make sure to place the food on wax paper or a small dish so you can refresh the food easily. I try to stay away from ‘leaky’ foods like tomatoes because I don’t want the liquids seeping into the substrate. I also stay away from fruits because it tends to attract pests like fungus gnats. It also tends to get moldy quickly. While the isopods may not mind the mold, I certainly do.
Some happy isopods in their new habitat!
For protein, I offer them fish flakes, dead or freeze dried insects, dried shrimp – things like that. Just make sure to always use a dish to remove old food.
Lastly for calcium, make sure to replenish the egg shells as they get eaten over time, as well as the limestone if you are using it. Isopods need calcium to ensure their exoskeleton remains strong and durable.
For maintenance, you don’t really need to do too much. The most important thing is to make sure you maintain the moisture in the habitat. Don’t leave the lid off overnight, that could dry them out. Misting the habitat every few days should be more than enough, and may also be too much depending on your specific climate. If you mist too much, you will inviting mold and pest problems. So before you mist, try to get a feel for the moisture content of the sphagnum moss side of the habitat. It it’s still relatively moist or wet from the last misting, don’t mist again. If it feels like it maybe getting dry, mist more often. But remember that isopods like a humid environment – not a wet one.
All done! Thanks for joining us on this project!

There’s a lot to explore right where we are, in our own neighborhoods and backyards! Join us while we get off the couch and explore the everyday wonders of nature, science, space, engineering, art, and anything else we stumble upon during on our adventures.
