This page may contain affiliate links.
Read our disclosure and privacy policy here.
Welcome to the world of ant-keeping! Ants are fascinating insects, and becoming an ant keeper allows you to observe their intricate societies up close. It’s a great hobby for kids, giving them an opportunity to learn about biology, insect interactions, life cycles, and more. By setting up and maintaining a small ant colony, children can witness the ants’ daily activities like foraging, communicating, and caring for their young. The test tube setup is a very common and easy to create ant habitat that will serve your ants for over a year as the queen begins to establish her colony. Depending on the species, a test tube setup could hold as many as a hundred or more ants!
Table of Contents
Make a Simple Test Tube Founding Chamber For Your Queen Ant
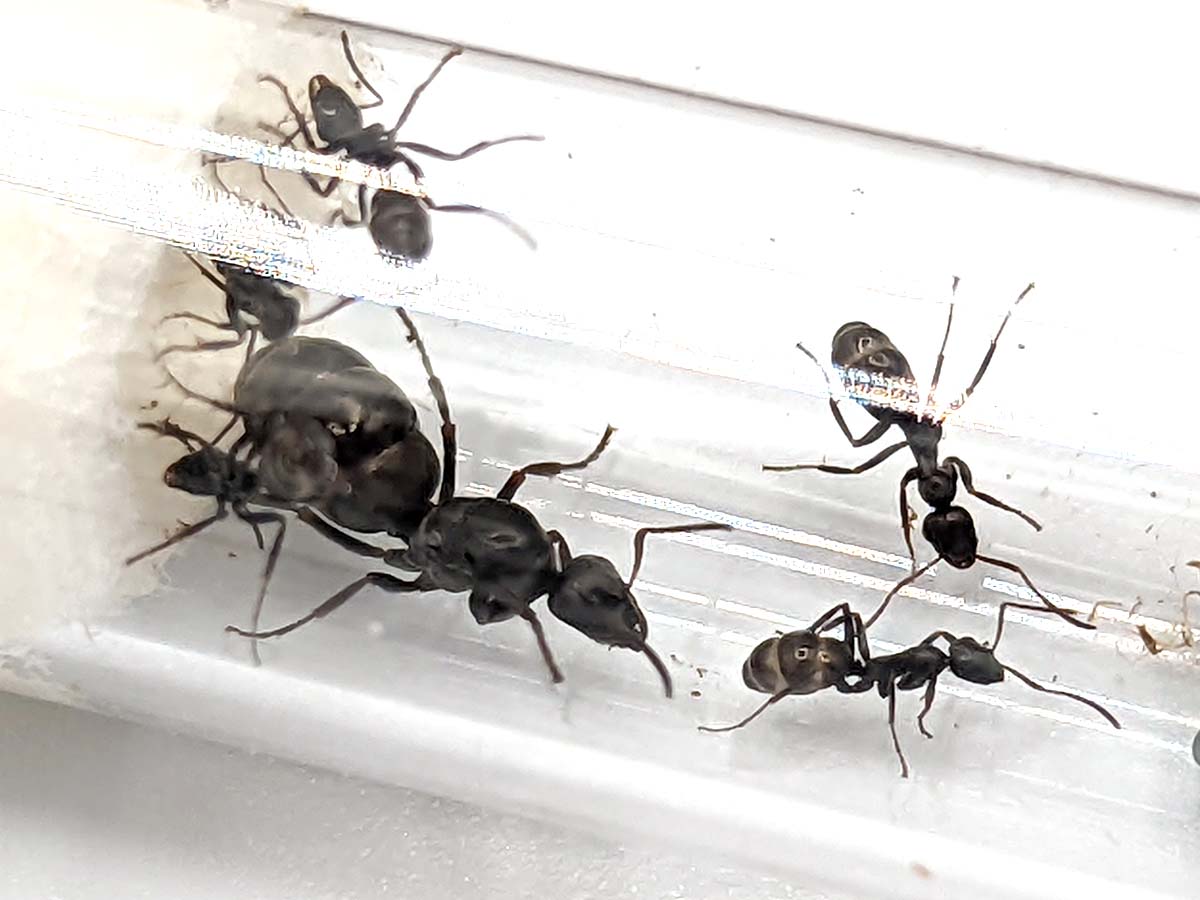
PROJECT PREVIEW
Project Preview
Project Preview
sneak peek
List of Materials & Tools
Materials Required
- 10mm to 15mm test tube (plastic is safer, while glass allows better clarity to view the ants)
- small or large cotton balls (depending on the size of your test tube)
- clean stick or rod (to push the cotton ball into the test tube)
- distilled water
- plastic small vialSmall sample collection vials are an essential explorer’s tool. You’ll need them to collect various samples and keep them safe in your pockets or your backpack while you continue to explore. Click the link to see our recommendations for vials. Learn More (for collecting a queen ant)
- rubber / vinyl / latex gloves (optional, to keep the test tube setup sterile)
Step 1: Catch a Queen Ant
The first step in starting your own ant colony is to catch a queen ant of course! There are a number of ways to do this. So if you have not yet caught a queen ant, read this article on how to catch your first queen ant. The best time to catch them is during a nuptial flight when new potential queens leave their colony to mate and start a new colony. You can read this article to help you identify when a nuptial flight is about to happen. Once you have your queen ant, you’re ready for the next step!
Step 2: Prepare The Test Tube Founding Chamber
What is a founding chamber?
A founding chamber is like a special bedroom for a queen ant when she starts her own colony. Just like a queen bee has her own hive, a queen ant needs a cozy space to lay her eggs and start her ant family. The founding chamber is where she builds her first home and raises her very first workers. In nature, the queen constructs this chamber by digging a small tunnel underground or finding a safe spot in a cozy corner. Inside, she creates small chamber where she can lay her eggs and protect them from any danger. The founding chamber is the heart of a brand new ant colony, and it’s where the magic of ant life begins.
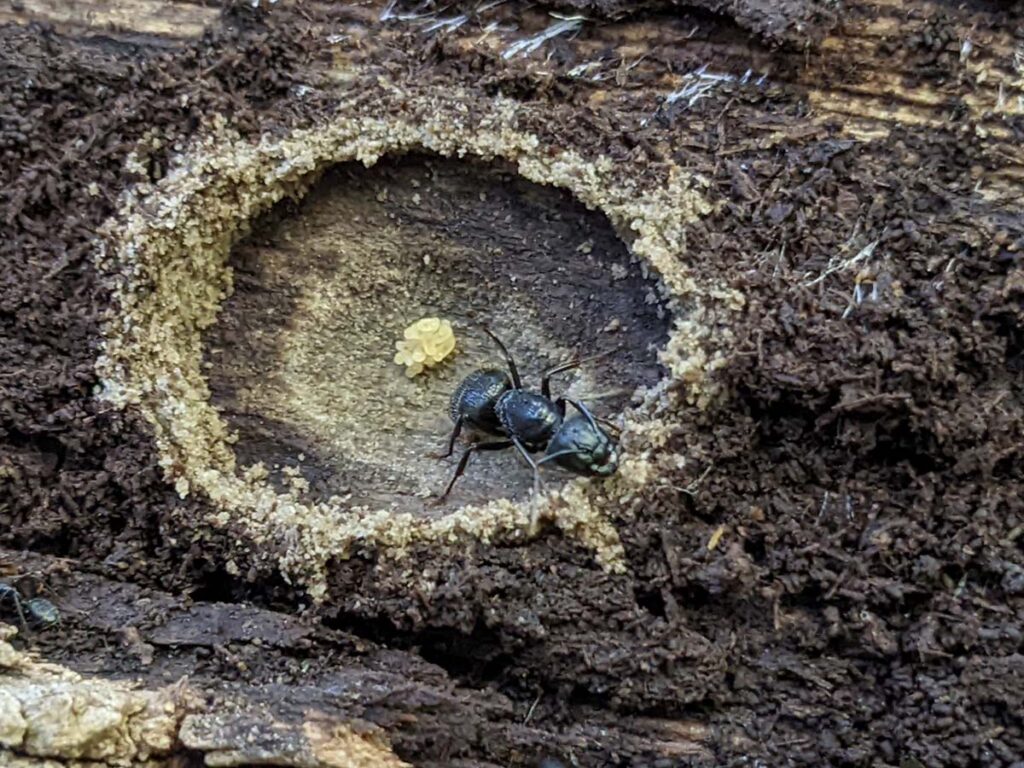
Example of a founding chamber build by a carpenter queen ant. This founding chamber was found under a loose piece of bark on a fallen log in the forest.
When trying to recreate this environment for a queen ant in captivity, we need to consider the most important aspects of the environment of a founding chamber.
- The humidity is relatively high
- It’s small and cozy
- It’s dark and private
A test tube setup is the ideal setup to recreate this environment because it can easily support the humidity and size requirements of the queen ant, as well as provide you the ability to watch her periodically – which, in the end, is the whole point of starting an ant colony in the first place!
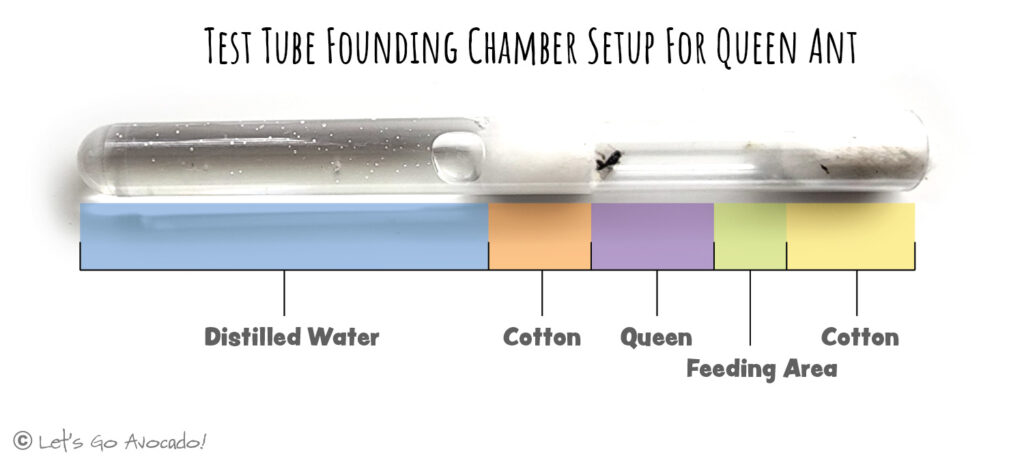
Preparing the test tube for your queen ant
Another reason why a test tube setup is ideal for founding an ant colony is because it is really easy to do. All you need to do is make sure your text tube is clean, fill it up half way with distilled water, and then push in a cotton ball all the way into the water, but not past the water level.
Using distilled water is important as tap water was been treated and may contain chemicals that could be harmful to your ants. Distilled water is chemical free and I tend to use this for all my small critter needs, just to be safe. When filling your test tube with water, you want to make sure you fill it about half way, but not much more than that. You need to leave room for the queen to have enough space to live, as well as give yourself some room at the opening of the test tube to place food, and close it with a cotton ball.
Step 3: Add Your Queen Ant
Now comes the fun part! You will need to gently add your queen ant into the test tube set-up. If you have caught your queen ant with the recommended small vial from the article on how to catch a queen ant, this this part is easy. You can simply hold the test tube upright and gently tap the queen at into the test tube. Try not to vigorously shake the queen ant – if she is clinging to the inside of the vial, just tap it gently to try to shake her loose.
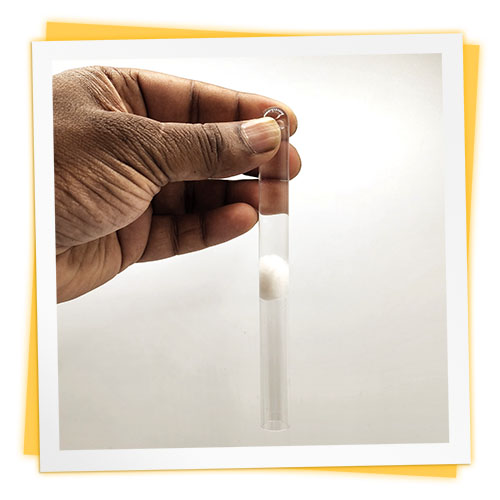
Once she is inside the test tube setup, use a cotton ball to close the opening to the test tube. Don’t try to force a large cotton ball tightly into the test tube, as this will prevent good air exchange. Instead, get a cotton ball that fits snugly but easily into the test tube. It should not have to compress too much. This will allow enough air exchange in the tube.

Teachable Moment
Teachable Moment
Download Printables
Why Doesn't The Water Spill Out?
After adding the cotton into the test tube to block the water, why doesn’t the water just spill out of the test tube when you turn it over? Cotton is not a solid barrier after all! Well, the reason the water does not spill out has to the with the air pressure inside the water area of the test tube.
When you add the cotton into the test tube, it becomes soaked with water and all the air gaps inside the cotton are filled with water. It becomes waterlogged, meaning that it is completely filled, or saturated, with water. This creates a separation between the air outside the test tube, and the air inside the test tube in the water area. When you turn over the test tube, the air pressure outside the test tube pushes up against the cotton, while the air pressure inside the test tube pushed down against the water and cotton. Since both sides are pushing with exactly the same strength, or pressure, the cotton does not move, and the water does not spill out.
Step 4: Store Test Tube in a Dark Quiet Place
Now that your queen ant is all setup, find a quiet dark place to place the test tube so that it does not roll around, and leave her along for several days to 2-3 weeks. She needs to get comfortable and feel safe before laying her eggs. If she gets too stressed out, she may eat the eggs. I know it’s hard to resist, but try to leave her alone for at least a few days and then check in on her. If all goes well, she will have laid her first eggs, and you’ll be on your way to growing your very own ant colony. Enjoy!

There’s a lot to explore right where we are, in our own neighborhoods and backyards! Join us while we get off the couch and explore the everyday wonders of nature, science, space, engineering, art, and anything else we stumble upon during on our adventures.
